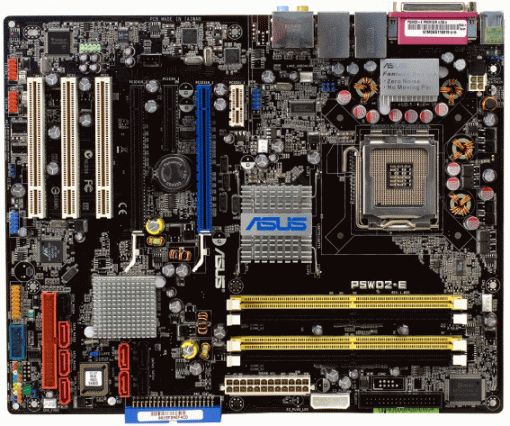
Step One: Mount Your Motherboard
To start, open up your case's box, take out
the case, and open it up. Usually this involves unscrewing a few thumb screws
on the back of your case and sliding the side panels off. Take a good look
around your case and get acquainted; note where the hard drive bays are, where
your CD drive will go, whether the power supply mounts on the top or the
bottom, and so on. There should also be a bag of screws inside your case; grab
that now and set it aside because we'll need it in a few minutes.
Open up your motherboard box and take out the
I/O shield, which is the metal plate that protects the ports on the back of
your motherboard. You should see a rectangular space in the back of your case
where this should go. Snap it into place. This takes quite a bit of force, so
make sure all four sides are snapped in securely.
Next, pull out your motherboard and line up
the ports on the back with the I/O shield. You should see that the holes on
your motherboard line up with screw holes on the bottom of your case. There are
probably more holes on your case than there are on your motherboard, so note
which ones these are, and grab your motherboard standoffs from your bag of
screws (they have a male screw end on one side, and a female screw hole on the
other side). Screw the standoffs into those holes, and set your motherboard on
top of them. Screw your motherboard screws into the standoffs so the
motherboard is snugly mounted.
Note: Many
of you have mentioned that you prefer to install the processor, cooler, RAM,
and power supply before mounting the motherboard in the case. I've never done
this myself, but in some cases, this may be simpler and save you some digging
around in your case. I recommend using your motherboard box as a small
"bench" for plugging these parts in if you're going to do it
separately.
Step Two: Install Your Processor
Open up your processor's box and gently take
it out. Your processor is one of the more fragile parts of the build, so this
is one step in which you'll want to be careful. Find the coner of your
processor that has a gold arrow on it, then look at your motherboard's
processor socket for a similar arrowed corner. Line these two arrows up; this
is the direction your processor will go into the socket.
Lift up the lever on the processor socket and
put your processor in (Intel motherboards might also have a cover you have to
lift up first). Pull the lever down to lock it into place. Again, do this
gently—it shouldn't require any feats of strength on your part, so if it isn't
falling into place easily, something's wrong. Take it out and try re-setting
it, make sure your two arrows are lined up, and of course, double check that
your motherboard and processor are of the same socket type.
Once your processor's in, grab the cooler that
came with your processor (remember, if you got an OEM processor you'll have to
buy a cooler separately). It should already have some silver thermal paste on
the bottom. If not, you'll need to pick some up from the computer store and put
a very thin line on your processor—I usually use about the size of a grain of
rice or two, that's all (see the video in Step Zero for more information on
this).
Set your cooler on top of your processor. If
you have an Intel cooler, you'll need to press down on the four pins until they
click. You can find more info on this in your processor's manual (it takes a
few tries, trust me). AMD coolers, like the one in the above video, are much
easier—just hook the two latches on the sides onto the motherboard's square
pegs, and pull the lever down to lock it into place.
Step Three: Install Your RAM
Installing RAM is very simple. Find the RAM
sockets on your motherboard, and pull the two clips on the side down. Line up
the notch in your RAM stick with the notch in the socket, and press the RAM
down into place. This might take a bit of pressure, so don't worry about being
overly gentle. The clips should snap back into place when the RAM is fully in
the socket.
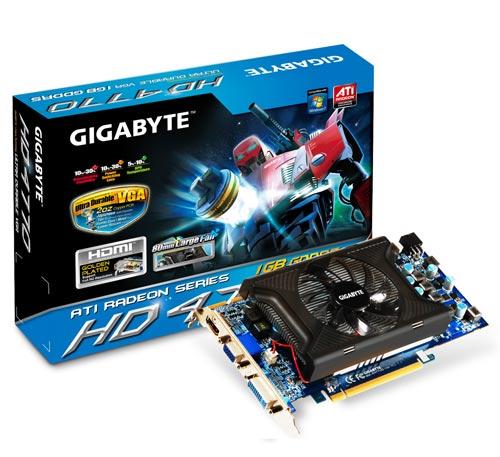
Step Four: Install Your PCI Cards
For your video card (or any other PCI
expansion card), find the topmost slot that fits your card and match that up
with its plate on the back of the case. Remove that plate and slide the PCI
card's bracket in its place. The card should then be sitting on top of the
socket, and all you need to do is press down to lock it into place. Screw the
bracket onto the case, and you're good to go.
Note that if you need to remove it for any
reason, there may be a small lever on the back of the socket you need to press
before you pull it out.
Step Five: Install Your Hard Drive
Every case is a little bit different in how they
install hard drives. Generally, there are two methods: on some cases, you have
to pull out a hard drive tray, put the drive in, screw it in securely, and then
slide the tray back in. Other motherboards just require you to slide the bare
drive into the bay and then screw it in snug after the fact. Check your case's
manual for more detailed instructions on this particular step.
If you're using multiple hard drives and a big
case, it's usually a good idea to leave some open space between them—that is,
putting them in the first and third bays instead of first and second. This
allows for more airflow between them and will help keep them running cool.
Step Six: Install Your Optical Drive
The optical drive should be pretty
self-explanatory. Just pull out the plastic cover on one of your 5.25"
drive bays and slide in your optical drive. Screw it into place if necessary.
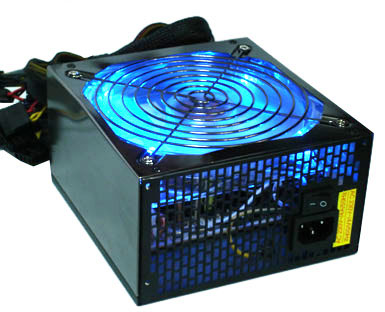
Step Seven: Mount Your Power Supply
Once everything else is in, it's time to
install your power supply and plug everything in. (Note that if your case came
with a power supply, you can skip this step, as it'll already be installed). It
should be pretty obvious where your power supply goes, as there will be a big
rectangular hole on the back of your case. Some power supplys mount on the top,
while some sit on the bottom of the case. Generally, they mount with the fan
facing away from the edge of the case, unless that case has enough space in
between the power supply mount and the end of the case to allow for airflow.
Once you set it into place, you should see the
holes on the back of the case line up with the screw holes in the power supply.
Screw it into place and you're all set.
Note: Many
of you have recommended installing your power supply before installing all the
other items. I've personally never done this, but depending on your case, it
may be ideal. Once again, plan before you build!
Step Eight: Plug Everything In
This can be the most tedious and difficult
part of the process, depending on your case and power supply. Separate the
cords coming out of your power supply and plug them in individually. You should
have:
A 24-pin Motherboard
Cable: This is the biggest cable on the power supply, which gives the
motherboard the electricity it needs to run. It has the very long plug with,
you guessed it, 24 little pins in it. Most cases should have a 20-pin with a
4-pin on the same cable, so you can just put them together and plug them into
the big 24-pin socket on your motherboard. It should lock into place, and might
take a bit of strength to get it in all the way. Push it in until you hear the
click and you can't pull it out with just a slight tug.
A 4-pin Motherboard Cable: You
should also have a separate 4-pin cable coming out of your power supply, and a
small 4-pin socket somewhere else on the motherboard. This plugs in the same
was as the 24-pin cable—just push down until it locks into place.
6-pin PCI Cables: If
you have a rather powerful graphics card, you might have to plug it into your
power supply. This requires the 6-pin "PCI" cable coming from your
power supply, which should look similar to the 24-pin and 4-pin cables. Plug it
into the end of your video card. Note that not all video cards require these
cables, so if it doesn't have a socket, you can leave it be.
SATA Power and Data
Cables: Your hard drives and optical drive plug in via SATA, which
contains two cables. One is the skinny black plug coming out of your power
supply, which gives power to those drives. The other is a small red cable that
should have come with your motherboard; this is the SATA cable that actually
transfers data between your hard drive and everything else.
Plug the power cable into the long pin on your
hard drive, and plug the data cable into the short pin. The sockets are
L-shaped, so they'll only go in one way. After plugging both cables into the
drive, be sure to plug the other end of the data cable into your motherboard,
in the sockets labeled SATA. Repeat this entire process with your optical
drive.
Molex Power Cables: Your
Molex cables power other miscellaneous things in your build, like the case
fans. Take the plugs connected to your case fans and plug the male side into
the female molex cable on your power supply. This takes a bit of force to get
in, and even more force to get out (seriously, these are my least favorite
cables of all time).
Note that some fans, like the one on your CPU,
might have a smaller connector that actually plugs into your motherboard
instead of the power supply instead of via Molex. The small headers will be
labled CPU_FAN or SYS_FAN. If they're three pronged, they'll power your fans,
but if your CPU cooler has a four-pronged fan plug then you'll also be able to
control its speed from some programs.
Front Panel Audio, USB,
and FireWire Connectors: Most cases have a few ports on the front,
which can include but are not limited to USB, FireWire, headphone, and
microphone jacks. You should see some small cables coming out of the front of
your case labeled things like USB, HD AUDIO, and 1394 (which is FireWire). Plug
these into their corresponding 8-pin headers on the motherboard—usually labeled
USB, AUD, and 1394, or something of the sort.
Power Switch and LED
Connectors: Lastly, you should have a few small cables labeled POWER SW,
RESET SW, HDD LED, and so on. These connect the switches and LEDs on the front
of your case to the motherboard, so you can actually turn your computer on.
They all consist of only one or two pins, and all plug in on an 8-pin header
somewhere on the motherboard. This varies from build to build, so you'll have
to check your motherboard's manual to see how they all plug in. Your
motherboard may also have a small speaker that plugs into an 8-pin connector,
which you'll find in your motherboard box and will be listed in your
motherboard's manual.
A Note on Cable Management
As you're doing all this, you want to be wary
of where you're putting these cables. Generally, you want to keep them as out
of the way as possible. The more they're tangled up in the middle of your case,
the more they're going to block airflow from your fans, causing your computer
to run hotter, louder, and possibly even overheat. Your case may have come with
some zip ties to help you wrap them up and get them out of the way. Some cases
even come with built-in cable management features, like clips or holes through
which you route these cables to keep them out of the way.
Cable management is a beast unto its own, and
it differs from case to case, so it's just something you'll have to fiddle
with. I could do an entire night school on cable management, but I won't. If
you have a particularly complicated build where a few simple zip ties won't
suffice, I recommend checking out NCIX
Tech Tip's cable management guide, shown above, which will
take you through some more advanced cable management techniques.
The Final Step: Turn It On
When you're done, plug in the power cable in
the back, flip the power switch on, and press the power button on the front of
your case. If all goes well, your computer should turn on and, if you plug a
monitor into your video card (or motherboard, if you don't have a video card),
you should see what's called the POST screen. From there, you can head into
your BIOS setup by pressing a key on your keyboard (usually Delete).
At this point, it's probably time to start
cleaning up. I usually don't throw anything away but the actual garbage. I keep
all the screws, brackets, and miscellaneous pieces I didn't use in the
motherboard's box, and that becomes my "build box". That way, in
future builds, or if I upgrade that build, I always have extras of everything
on hand just in case. It's come in handy on more than one occasion, so I can't
recommend this enough if you have any pieces left over.
Common Troubleshooting
If your computer didn't turn on, don't panic.
First, recheck everything inside. Is your processor seated correctly? If your
RAM all the way in its socket? Are your cables plugged into the right sockets?
(this is a big one). Run through the entire process again to make sure you did
everything correctly.
If your system turns on but makes a beeping
noise instead of going through the POST screen, then you have an error. If you
can find your motherboard's BIOS manufacturer (either by watching the POST
screen or by searching online), you can diagnose these error codes to find out
what's wrong with your system using these pages:
Also remember that Google is an extremely
useful tool. If you're having issues but can't figure out what's wrong, try
searching the net or posting on a computer building forum like Reddit's /r/buildapc. If nothing
seems to help, you might have a faulty piece of hardware, like your power
supply or motherboard, and you should go about exchanging it for something that
works. I wouldn't jump to this conclusion too quickly, though—dig around in
your case and do some research to make sure you didn't just plug something in
incorrectly.
Once you've got a working computer,
congratulations! You're in the home stretch, now—all you need to do is install
an operating system. We'll come back to that tomorrow, but in the meantime, bask in
the gloriousness of your accomplishment—it took a lot of work to get here, and
you should feel good about yourself.


